
Using an Interactive Whiteboard in real classrooms changes the teaching experience by making lessons more interactive, organized, and efficient. Instead of relying only on manual writing, teachers can display visual content, interact with lesson materials, and explain topics more clearly. From my observation, teachers who use an interactive whiteboard daily can manage lessons faster and maintain better student attention.
One of the biggest benefits is improved lesson delivery. Teachers can write notes, highlight key points, and open lesson files directly on the interactive whiteboard without needing extra devices. This reduces setup time and allows teachers to focus more on teaching instead of managing equipment. In real classroom situations, this makes lesson flow smoother and more professional.
Student interaction also improves significantly. Interactive whiteboards allow students to participate by writing answers, solving problems, and interacting with lesson content directly. Based on classroom experience, students become more attentive and engaged when they can see clear visuals and interact with the board. In my opinion, this creates a more active learning environment compared to traditional teaching methods.
Proper classroom setup is equally important for achieving the best results. The interactive whiteboard must be installed at the correct height and position to ensure comfortable use for teachers and clear visibility for students. Correct installation also improves touch accuracy and overall usability. Schools that follow proper setup practices experience fewer technical issues and better classroom performance.
Power stability and internet connectivity also play an important role. Interactive whiteboards rely on stable power and internet access to run smoothly and support online teaching resources. From practical classroom use, a proper setup ensures consistent performance and prevents interruptions during lessons.
Installation type is another key consideration. Schools can choose wall-mounted installation for permanent classrooms or mobile stand setup for flexible usage. Each option offers different benefits depending on classroom needs and usage requirements.
At the end of the day, the real value of an Interactive Whiteboard depends on proper classroom setup and daily teaching use. When installed correctly and used effectively, it improves lesson clarity, student engagement, and overall classroom teaching experience.
Real-World Teaching Experience

The real-world teaching experience with an Interactive Whiteboard is significantly different from traditional classroom methods because it allows teachers to explain lessons more clearly and interact with students directly. From a practical classroom perspective, interactive whiteboards improve lesson delivery by combining writing, visual content, and digital tools into one system.
This section focuses on how interactive whiteboards perform during daily teaching, including teacher usability, student engagement, and common classroom challenges. From my observation, teachers who use an interactive whiteboard regularly find it easier to explain complex topics, while students become more involved because they can see and interact with lesson content more clearly.
Based on classroom feedback, the teaching experience depends heavily on touch response, display clarity, and system speed. A well-configured Interactive Whiteboard makes lesson delivery smoother, reduces preparation time, and improves overall classroom efficiency. In the following sections, we will explore teacher experience, student interaction, and real classroom challenges in detail.
Teacher Experience in Daily Use
The daily teaching experience with an Interactive Whiteboard is noticeably more efficient compared to traditional boards because teachers can manage lessons, display content, and interact with students using a single system. From my observation, teachers who use an interactive whiteboard regularly spend less time setting up equipment and more time focusing on actual teaching. This improves lesson flow and reduces classroom interruptions.
One of the biggest advantages teachers notice is how quickly they can start lessons. With a modern interactive whiteboard, teachers can turn on the system and open lesson files within 10–20 seconds, without needing a separate projector or laptop connection. In real classroom situations, this saves valuable time, especially when teachers handle multiple classes in a day.
Writing and explaining lessons also feel more natural. Interactive whiteboards allow teachers to write using their fingers ora stylus, highlight key points, and erase content instantly. Based on teacher feedback, smooth touch response makes writing comfortable, especially during longer lessons. In my opinion, this improves teaching confidence because teachers can focus on explanation instead of worrying about technical delays.
Another important benefit is the ability to use multimedia content during lessons. Teachers can open presentations, show videos, and display diagrams directly on the interactive whiteboard. From a practical teaching perspective, this makes complex topics easier to explain. Many teachers report that visual explanations improve student understanding and reduce the need for repeated explanations.
Lesson organization is also easier with an interactive whiteboard. Teachers can save notes and reuse them later instead of rewriting the same lesson for every class. In real classroom use, this reduces workload and improves teaching consistency. Based on usage patterns, teachers who use saved lesson materials save 15–30 minutes of preparation time per day.
Here is a practical summary of teacher experience improvements:
Teaching Task | Traditional Board Experience | Interactive Whiteboard Experience |
Lesson startup time | Requires multiple device setup | Ready within seconds |
Writing and explanation | Manual writing only | Smooth writing with digital tools |
Multimedia usage | Requires a separate projector | Built-in multimedia support |
Lesson saving | Not possible | Lessons can be saved and reused |
Teaching efficiency | Slower lesson flow | Faster and more organized teaching |
From my observation, teachers usually become comfortable using an interactive whiteboard within 2–5 days of regular use. The learning curve is minimal because the system is designed for simple touch interaction.
At the end of the day, an Interactive Whiteboard improves daily teaching by making lesson delivery faster, more organized, and more interactive. For teachers who conduct multiple classes every day, this technology provides real practical benefits and improves overall classroom efficiency.
Student Engagement & Participation
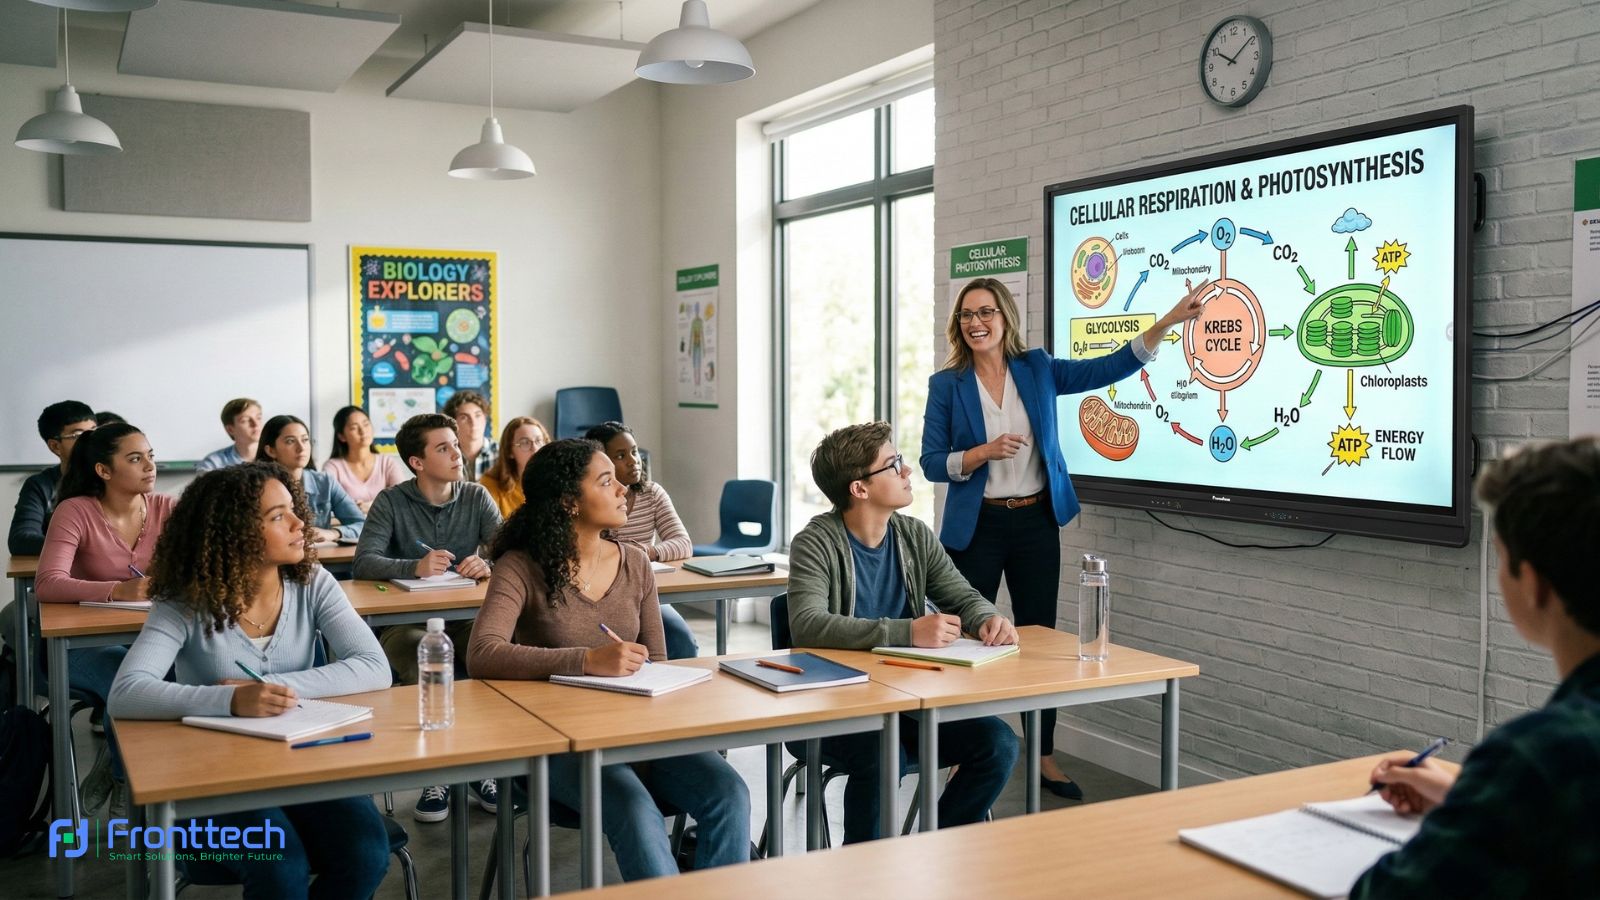
Student engagement improves significantly when an Interactive Whiteboard is used because students are no longer limited to passive listening. Instead of only watching the teacher write on a board, students can see visual explanations, interact directly with lesson content, and participate in activities. From my observation, students pay more attention when lessons include touch interaction and visual elements compared to traditional teaching methods.
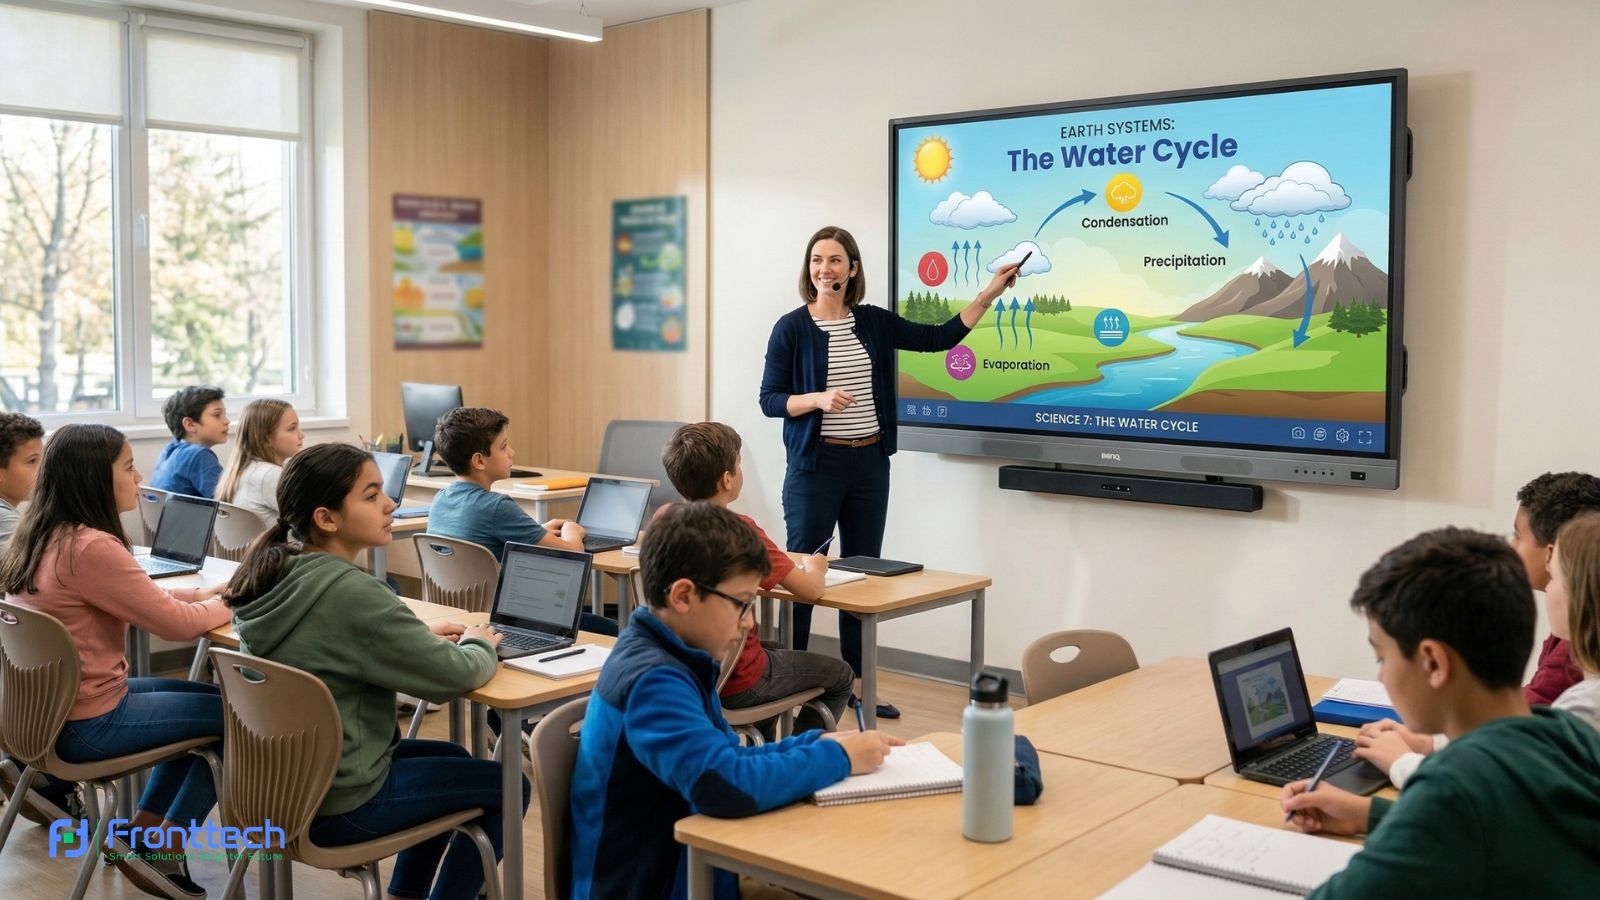
One of the most noticeable changes is how students respond to visual learning. An interactive whiteboard allows teachers to display diagrams, play educational videos, and explain concepts step by step using digital tools. Based on classroom experience, students understand complex topics faster when they can see clear visuals instead of relying only on verbal explanation. This is especially helpful in subjects like mathematics and science, where visual clarity improves understanding.
Another important factor is direct student interaction. Teachers can invite students to the interactive whiteboard to solve problems, write answers, or complete exercises. In my opinion, this builds confidence and encourages active participation. Students feel more involved in the lesson because they are physically interacting with the learning material rather than just observing.
Interactive whiteboards also support collaborative learning. Multiple students can participate during group activities, which encourages teamwork and communication. From practical classroom use, students become more motivated when learning feels interactive instead of repetitive. This creates a more active classroom environment and improves overall learning effectiveness.
Immediate feedback is another real advantage. Teachers can correct mistakes instantly and explain concepts more clearly using the interactive whiteboard. Many teachers report that students learn faster when feedback is given in real time. This improves both student confidence and lesson retention.
From a real-world teaching perspective, an Interactive Whiteboard transforms the classroom into a more engaging learning environment. Students focus more, participate actively, and develop a better understanding of lesson content.
At the end of the day, student engagement depends on how effectively lessons are delivered. An Interactive Whiteboard helps teachers create interactive, visual, and participatory lessons, which leads to better learning outcomes and a more effective classroom experience.
Common Classroom Challenges & Solutions
While an Interactive Whiteboard improves teaching efficiency and student engagement, teachers may face some practical challenges during daily classroom use. From my observation, most of these issues are not major technical problems but small usability and setup challenges that can be solved easily with proper understanding and preparation.
One of the most common challenges is slow system response. This usually happens when the interactive whiteboard has lower RAM or too many apps running at the same time. In real classroom use, this can delay lesson flow and interrupt teaching. The practical solution is to use an interactive whiteboard with at least 4GB RAM and close unused apps regularly. Many teachers report that system performance improves immediately when unnecessary apps are closed.
Another challenge is touch accuracy and calibration. Sometimes, teachers may notice that writing does not align perfectly with finger or stylus movement. This usually happens due to calibration settings or screen positioning. Based on classroom experience, running the built-in calibration tool fixes this issue within a few minutes. Most interactive whiteboards include automatic calibration options, which makes the process simple.
Internet connectivity can also affect classroom performance. Teachers often use online videos and educational platforms during lessons. If the WiFi signal is weak, content may load slowly. In my opinion, using a stable LAN (wired internet) connection provides more reliable performance, especially in schools where multiple devices use the network simultaneously.
Another real challenge is teacher adaptation during the initial days. Teachers who are used to traditional boards may need some time to become comfortable with the interactive whiteboard interface. From practical classroom feedback, most teachers become fully comfortable within 3–7 days of regular use. The touch interface is simple, and basic functions like writing and opening lesson files are easy to learn.
Screen visibility can also be affected by classroom lighting conditions. If strong sunlight directly hits the interactive whiteboard, display clarity may be reduced. The practical solution is proper installation position and adjusting display brightness settings. Modern interactive whiteboards usually provide adjustable brightness, which improves visibility in different lighting environments.
Maintenance is another factor teachers should consider. Dust and fingerprints can reduce screen clarity over time. Regular cleaning using a soft microfiber cloth keeps the interactive whiteboard in good condition. Many schools report that basic weekly cleaning is enough to maintain clear display quality.
From a real classroom perspective, most interactive whiteboard challenges are minor and easily manageable. With proper setup, a stable internet connection, and basic maintenance, teachers can use the system smoothly without interruptions.
At the end of the day, an Interactive Whiteboard becomes a reliable teaching tool once teachers become familiar with its features. Understanding common challenges and their solutions ensures smoother classroom operation and a better teaching experience.
Installation & Classroom Setup Guide
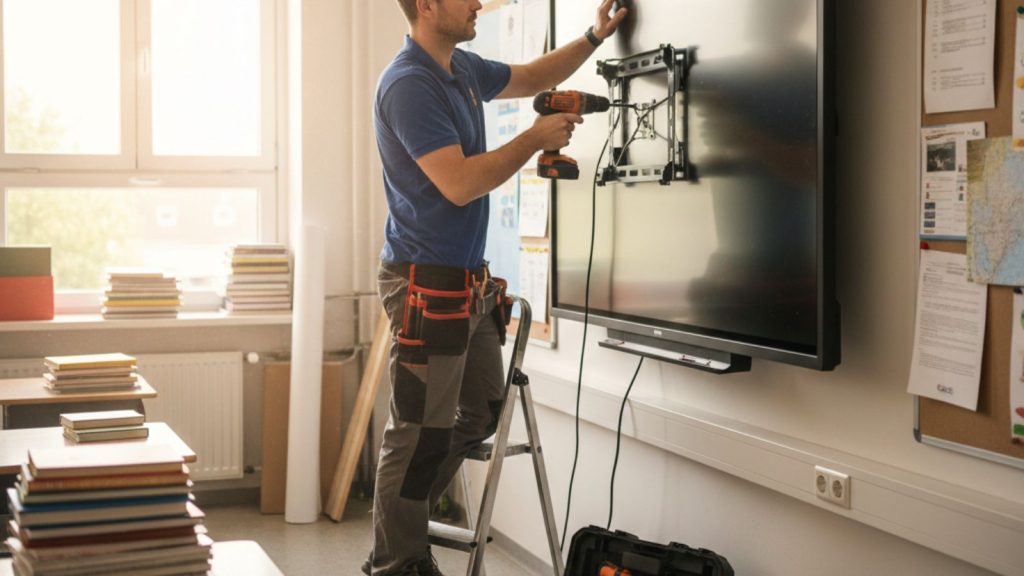
Proper installation and classroom setup are crucial for achieving optimal performance from an Interactive Whiteboard. Correct placement, a stable power connection, and a proper viewing position all directly affect teaching comfort and student visibility. From a real classroom perspective, even a high-quality interactive whiteboard may not deliver good results if it is installed at the wrong height or position.
This section explains how to install an interactive whiteboard correctly, including wall mounting, stand setup, power requirements, and classroom positioning. From my observation, schools that follow proper installation guidelines experience better visibility, smoother teaching, and fewer usability problems.
Another important factor is classroom layout. The interactive whiteboard must be positioned where all students can see clearly without obstruction. Proper setup also ensures a comfortable writing height for teachers and easy student interaction. Based on classroom experience, correct installation improves both teaching efficiency and long-term usability.
In the following sections, we will explain wall-mounted vs mobile stand setup, power and internet requirements, and common installation mistakes schools should avoid when setting up an Interactive Whiteboard.
Wall-Mounted vs Mobile Stand Setup
When installing an Interactive Whiteboard, schools must choose between a wall-mounted setup and a mobile stand setup. This decision affects stability, flexibility, classroom space, and long-term usability. From a practical classroom perspective, both options work well, but each serves a different purpose depending on how the interactive whiteboard will be used.
A wall-mounted interactive whiteboard is fixed permanently to the wall, which provides maximum stability during daily teaching. From my observation, teachers feel more comfortable writing on a wall-mounted board because there is no movement when touching or writing on the screen. This makes lesson delivery smoother and more natural. Wall-mounted installation is especially suitable for classrooms where the interactive whiteboard will remain in the same position permanently.
Mobile stand setups offer more flexibility. The interactive whiteboard is mounted on a movable stand with wheels, allowing it to be used in multiple classrooms. In my opinion, this setup is useful for schools that want to share one interactive whiteboard between different rooms or use it for training sessions. Teachers can move the board easily without needing reinstall.
However, mobile stand setups may not feel as stable as wall-mounted installations, especially when multiple students interact with the board. Based on classroom experience, high-quality mobile stands with wheel locks provide better stability and safer use.
Here is a practical comparison to help schools choose the right setup:
Setup Type | Stability | Flexibility | Best For | Real Classroom Insight |
Wall-Mounted Interactive Whiteboard | Maximum stability | Fixed position | Permanent classrooms | Best for daily classroom use and long-term setup |
Mobile Stand Interactive Whiteboard | Good stability | Easily movable | Shared classrooms or training rooms | Best for flexible usage across multiple rooms |
From a real decision-making standpoint, wall-mounted setups are the best choice for schools with dedicated smart classrooms. Mobile stand setups are more suitable for institutions that need flexibility and shared usage.
At the end of the day, the right Interactive Whiteboard installation depends on classroom needs. If stability and permanent setup are the priority, wall-mounted installation is the better option. If flexibility and mobility are important, a mobile stand setup provides more convenience.
Power, Internet & Classroom Space Requirements
Proper power supply, stable internet connection, and correct classroom positioning are essential for the smooth operation of an Interactive Whiteboard. From a real classroom perspective, even a high-quality interactive whiteboard cannot perform properly if power is unstable, the internet is slow, or the board is installed in an unsuitable location. Ensuring these basic requirements helps teachers use the system without interruptions and improves overall teaching efficiency.
Power stability is the first and most important requirement. Most classroom interactive whiteboards consume around 120 to 350 watts during active use, depending on screen size and brightness level. Based on classroom experience, using a dedicated power outlet with proper grounding ensures safe operation and protects the system from voltage fluctuations. In my opinion, schools should also use a UPS (Uninterruptible Power Supply) or voltage stabilizer, especially in areas where power outages or voltage drops are common. This protects the interactive whiteboard from sudden shutdowns and hardware damage.
Internet connectivity is equally important because many teaching activities rely on online content. Teachers often use YouTube videos, cloud storage, and online learning platforms during lessons. From my observation, a minimum internet speed of 20–50 Mbps per classroom provides smooth video playback and fast content loading. While WiFi works well for general use, a wired LAN connection offers more stable performance, especially when multiple classrooms use the internet simultaneously.
Classroom space and placement also affect usability. The interactive whiteboard should be installed at a height where teachers and students can comfortably interact with the screen. Typically, the center of the screen should be positioned around 140–160 cm from the floor, depending on the classroom level and student age. Proper placement ensures that all students can see the content clearly without obstruction.
Viewing distance is another important factor. For example, a 75-inch interactive whiteboard and a 65-inch interactive whitebord provides optimal visibility for classrooms where students sit within 3 to 8 meters from the screen. Larger classrooms may require larger screens to maintain clear visibility.
Here is a practical overview of basic setup requirements:
Requirement | Recommended Standard | Real Classroom Benefit |
Power Supply | Dedicated power outlet with grounding | Stable performance and hardware protection |
Power Backup | A UPS or a voltage stabilizer is recommended | Prevents damage during power interruption |
Internet Speed | Minimum 20–50 Mbps per classroom | Smooth video playback and online teaching |
Internet Connection Type | LAN preferred, WiFi supported | More reliable and consistent connectivity |
Installation Height | Screen center at 140–160 cm from the floor | Comfortable interaction for teachers and students |
Viewing Distance | 3–8 meters for a 75-inch display | Clear visibility for all students |
From a real classroom setup perspective, proper power, internet, and placement planning ensure that the Interactive Whiteboard works efficiently without technical interruptions.
At the end of the day, meeting these basic requirements helps schools get the best performance from their interactive whiteboard. Stable power, reliable internet, and correct placement create a smoother teaching experience and improve classroom usability.
Installation Mistakes to Avoid
Proper installation is essential for getting the best performance from an Interactive Whiteboard, but many schools make small setup mistakes that affect usability and long-term reliability. From my observation, these mistakes are usually not related to the device itself but to placement, power setup, and classroom planning. Avoiding these errors ensures smooth teaching and prevents unnecessary technical problems later.
One of the most common mistakes is installing the interactive whiteboard at the wrong height. If the board is mounted too high, students cannot interact comfortably. If it is too low, teachers may find it uncomfortable to write for long periods. In real classroom setups, the bottom edge of the interactive whiteboard should typically be positioned around 85–95 cm from the floor, depending on student age and classroom level. This ensures comfortable access for both teachers and students.
Another frequent issue is poor wall positioning. Installing the interactive whiteboard where direct sunlight hits the screen can reduce visibility and cause glare. Based on classroom experience, placing the board on a wall that avoids direct sunlight improves screen clarity and student visibility. Proper positioning also ensures that all students have a clear line of sight.
Power setup mistakes can also create long-term problems. Connecting the interactive whiteboard to unstable power sources without proper grounding can lead to unexpected shutdowns or hardware damage. In my opinion, using a dedicated power outlet with proper grounding and voltage protection improves long-term reliability.
Internet connectivity planning is often overlooked during installation. If the interactive whiteboard is installed far from WiFi routers or LAN ports, teachers may experience slow internet speeds. From practical classroom use, ensuring stable internet connectivity during installation prevents delays when using online teaching tools.
Another mistake is not leaving enough space around the interactive whiteboard. Teachers need room to move and interact comfortably. Limited space can make teaching less convenient and restrict student interaction. Proper installation planning ensures enough space for natural classroom use.
Ignoring calibration after installation is also a common issue. Interactive whiteboards need initial calibration to ensure accurate touch response. Many teachers report that running the built-in calibration tool after installation improves writing accuracy and overall usability.
From a real classroom perspective, avoiding these installation mistakes ensures that the Interactive Whiteboard performs reliably from day one. Proper height, stable power, good positioning, and correct calibration make a significant difference in daily teaching experience.
At the end of the day, correct installation is just as important as choosing the right Interactive Whiteboard. Schools that follow proper installation practices experience smoother teaching, better usability, and fewer technical problems over time.
Frequently Asked Questions About Interactive Whiteboard Teaching Experience & Classroom Setup
When schools start using an Interactive Whiteboard, teachers and administrators often have practical questions about installation, classroom setup, and daily teaching usability. From real classroom experience, proper setup and correct usage make a significant difference in teaching performance and long-term reliability. The following answers cover the most important setup and teaching-related questions.
How is an Interactive Whiteboard used during daily classroom teaching?
An Interactive Whiteboard is used for writing lessons, displaying presentations, playing educational videos, and interacting with students directly. Teachers can open lesson files, explain topics visually, and save lesson notes for future use. This improves teaching efficiency and reduces preparation time.
What is the best installation height for an Interactive Whiteboard?
The bottom edge of an Interactive Whiteboard should typically be installed around 85–95 cm from the floor. This height ensures comfortable writing for teachers and easy access for students during classroom interaction.
Should schools choose a wall-mounted or a mobile stand setup?
Wall-mounted interactive whiteboards are best for permanent classrooms because they provide maximum stability. Mobile stand setups are suitable when schools need to move the interactive whiteboard between different classrooms.
Does an Interactive Whiteboard require a special power connection?
An Interactive Whiteboard works with a standard power outlet, but using a dedicated power line with proper grounding improves safety and long-term reliability. Many schools also use a UPS to protect the system from power interruptions.
Is internet connection necessary for Interactive Whiteboard use?
The Internet is not required for basic functions like writing and opening lesson files. However, an internet connection is needed to access online educational content, videos, and cloud-based teaching tools.
How much classroom space is needed for an Interactive Whiteboard?
An Interactive Whiteboard should be installed where all students can see clearly without obstruction. Proper space around the board allows teachers and students to interact comfortably and improves classroom usability.
Do teachers need training to use an Interactive Whiteboard?
Most teachers can learn to use an Interactive Whiteboard within a few days because it works with simple touch interaction. Basic functions like writing, opening files, and using teaching tools are easy to understand.